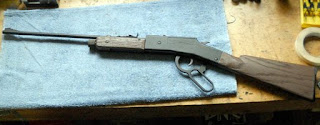
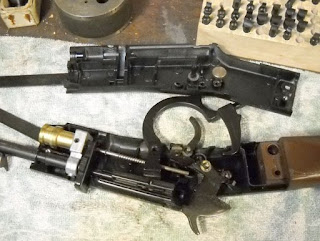
Still plugging away on this one.

Another go with the Cratex wheel. Removed the high spots from the remnants of the spot welds previously milled away. Goodbye old miserable sight.

Opted to mount a Weaver-type scope base. I looked around for a couple days and bought a couple $8 candidates for the parts box before settling on the
Weaver #88 base (for Mosberg shotguns). The bottom of the #88 is curved and a very close match to the B3-1 tube. It's taller than I'd like, but the extended length is a big plus as it will provide correct eye relief with most scopes as well as fit red dots. Downside? It's got that hi-gloss finish.

I painted the top of the receiver with some Dykem layout fluid and scratched a centerline, but it just made me nervous. I looked critically at the BAM receiver/barrel assembly and can tell it's not what you'd call 100% aligned. It's not off much, but the parallel line on the receiver didn't look parallel to the bore line. I removed the layout fluid and gave it some more thought. I finally decided to use the base itself to spot the holes. I mixed some 5-minute epoxy and put a small amount on the base. Let it tack, then pressed it onto the receiver. Aligned it by eye until it looked "right". I know, boo hiss. No drama yet. We'll all see much later if I got it right.

With the base glued, I spotted the 4 holes with a transfer punch then pulled the base off the receiver. The epoxy, fortunately, didn't put up much of a fight and peeled right off. Deepened the marks with a spring loaded center punch then found the drill bits.

Almost forgot. One of the other major points favoring the #88 base are the #6-48 mounting screws. The BAM receiver tube wall is about 0.0770" thick. The 48 threads per inch on the mounting screws allow for something like 3.6 threads in the tube wall. (Nick should check my math here) Anyway, I need thread contact to make this hold together and a finer thread gets more of them when there's no wall thickness to work with. I used a #31 (0.1200") as the tapping size drill. Had to make a run to
Kromhard Twist Drill company to get a #6-48 tap.

Serious sigh of relief when I saw that the holes lined up.

Not shown: Chucked the #6-48 tap in the drill press and started all the holes to ensure they were vertical. Finished to full thread depth by hand.

Base mounted.

Next problem: Screws protrude into the receiver tube. These need to be flush with the inside wall to allow the sliding compression tube to actually slide.

I thought about hand filing, but that'd take forever. Measured the thread protruding from the bottom of the base and added the receiver wall thickness. Tapped a brass nut to #6-48 and added washers until the numbers worked.

The washers, plus the nut thickness is exactly the amount of thread needed. All exposed thread is excess and can be cut off.

Mounted the nut into the 3-jaw chuck and faced off the threads with a carbide knife.

Screws started at 0.3085" OAL. Ended at 0.2480" Bolted the mount down and the screw depth was spot on. Of course, there were still burrs inside the tube at each hole from the drilling and tapping procedure.

Chucked a
flex-hone into a cordless drill and coated it with oil. (the flex hone, not the drill)

A quick, light pass deburred the tube.

Took a few minutes to clean out all the oil and metal debris, but the inside is smooth.

Removed the base from the receiver and set it up in the horizontal milling attachment on the Taig. Adding more cross slots seems somehow, um, appropriate to the project. I hesitate to utter the overused term "tactical"...

Anyway, what I'm trying to say is that I decided to make the rail look less "sporty" and more "tactical". You know, because this is a $60, 550 fps "tactical" air rifle. Uh huh.

So, I did some of this...

and some of that...

And since glossy isn't tactical, it got painted "flat military tactical spec-ops Navy SEAL black" from Rustoleum. Seriously, that's what the can said.
Still more in few days.


