Sunday, May 31, 2009

Benjamin Marauder

Last fall, I entered and won Crosman's Summer House contest. The top prize was an as-yet-unnamed rifle still in development. As the Discovery PCP rifle had recently come to market, there was a hint that this would be a "new and improved" version. The wait was well worth it. A .22 cal Benjamin Marauder serial number #100 along with a Benjamin HP hand pump arrived a couple days ago. It's my first PCP rifle. Kinda ironic that the Crosman Summer House entry I wrote was about restoring my late grandfather's 1954 Crosman 118 rifle. The 118 is a 10-shot, bolt-action repeater with a bulk-filled gas reservoir under the barrel. Ironic, because Crosman sent me a 10-shot, bolt-action repeater with a bulk-filled reservoir under the barrel.
I should probably pause and mention that since Crosman owns Benjamin, I tend to use the two names interchangeably. And, please excuse the lack of comprehensive photos. I only had time for a few pics.
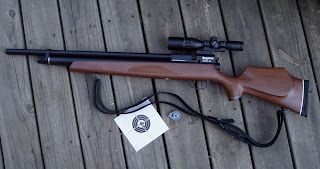
Some quick initial impressions: Filling the gun from almost zero to 2800 psi was a chore--to put it kindly. (The gun ships with just a few psi in the reservoir to hold the seals in place.) It was hotter than Hades and almost 100% humidity the night I got the rifle. I lost count of pump strokes, but there must have been a couple hundred. I took about 3 (Ok, maybe 5) breaks. I really wanted to lie on the basement's cool tile floor and wish for a scuba tank. Somewhere along the way, I rather quickly surmised that I'd made a tactical error: My initial plan to shoot the gun primarily on CO2 and occasionally on compressed air had a serious flaw.
The good news was that the pump force doesn't really increase much after about 1000 psi, it just took a while to get the gun filled. The Benjamin pump is a serious piece of hardware.
Note: You need only fill the gun once from zero. Top offs involve about 45 to 50 pump strokes and are not a problem. I've been topping the gun off every 40 shots. I should probably mention that I'm 39 and in OK shape...

This is 20 shots. The pellets kept going through the center. Just shy of 10 whopping meters. Hey, stop snickering. At least it was off-hand. I did mention the off-hand part, right? Anyway, the gun is absolutely motionless as it fires--like a 1o meter match rifle. Except, it's spitting .22 caliber pellets out over 900 feet per second. Once sighted, a hole just appears at the cross hair intersection. Then, rack the bolt and do it again 9 more times.

The gun is shrouded. It's pretty quiet. I've no basis for PCP noise comparison. The striker spring makes a weird "poiiiing" sound. That's about all you hear. The pellet impact is loud in comparison to the rifle's discharge noise.
Update: OK, I was at the Pyramyd Air moving sale. I DO have basis for comparison. Several unshrouded PCP rifles were fired (no pellets loaded) and they sounded like a .22 short. There is no way I'd shoot an unshrouded PCP without some hearing protection.

Pulled the closest scope (off another gun) that I could find. Happened to be a Leapers 6X "Bug Buster". Needed the offset mount because the compact scope has supremely short tube sections and the Marauder has a loading gate for the 10-shot magazine. Anyway, a "normal" looking scope will fit right on using a set of 2-piece rings. The gun has an integral 11mm dovetail. I think I want a 4-16X Centerpoint scope for the gun. I've got 2 now on other guns and it's a tough scope to beat for the money. A wide, useful power range allowing relatively quick snap shots in the woods as well as enough magnification to reach out on long sitting shots. Then, I think I want to keep it light with something like the 6X Bug Buster. If I was going to carry the rifle in the woods, scope weight would become the deciding factor.

Pressure gauge on the gun seems to agree exactly with the gauge on the hand pump.

Quick-fill Foster fitting.

I dropped the second stage of the trigger pull weight down to a couple ounces. The trigger in this gun makes me think Crosman fired their attorney. The trigger, to me, was the biggest revelation in this rifle. It's really impressive.

Wishes/changes/options would involve some seriously ridiculous nitpicking. This gun would be devastating in a .25 cal. There's enough power to make that a real contender of a caliber here. Of course it would be cool if the new adjustable Challenger stock fits, too. Oh, yeah, there is one thing. The gun should come standard with at least 3 magazines.
Saturday, May 30, 2009

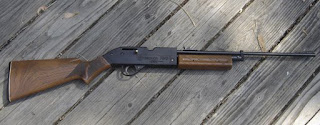
Disassembling an early Crosman Model 760, Part 2

On I go.

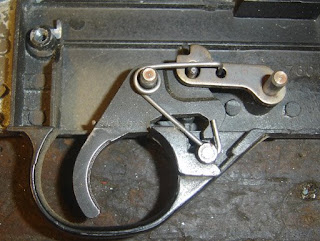
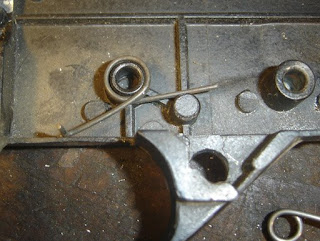
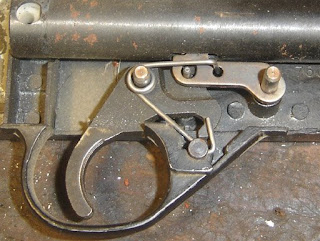
Always a good idea to take multiple pictures of the trigger group...the spring does double duty as safety detent and sear spring.

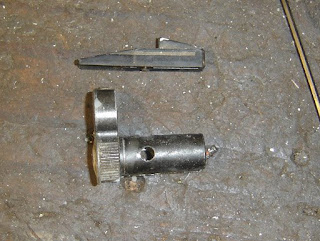
The aluminum transfer port unit was removed. The bolt assembly is plastic. There are 6 plastic parts on the rifle: bolt, front sight, bb loading port cover, stock fore and aft, and hammer plug. Compare that to the modern 760 which is mostly plastic.

The hammer and bolt parts. Note that this is a knock-open valve system, earlier 760 models used a self cocking valve like that on the 140/1400/130 guns.

The slot in the bolt that cocks the hammer.

Dirty valve assembly. The one fault I noticed before opening up the 760 was that the inlet valve wasn't closing.

The transfer port seal.

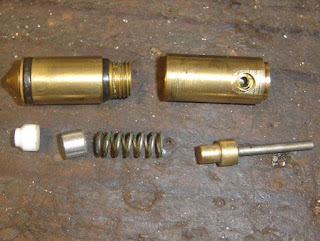
The valve. Notice the aluminum spacer between the spring and inlet valve. Later models just have a longer one piece inlet valve. I had spare inlet and exhaust valves and o-rings on hand as replacements.

Heck, another picture of the trigger.

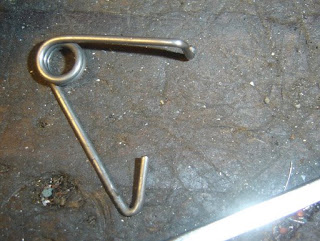
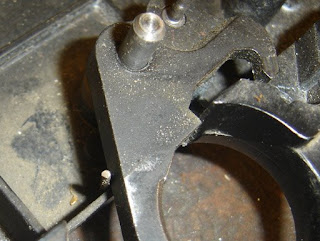
Spring. Notice the little hook that goes in the hole in the sear.

There's another spring under the trigger that hooks around the end.

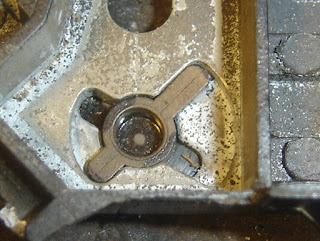
Always good to note.

The bb loading port cover can be rotated and removed.

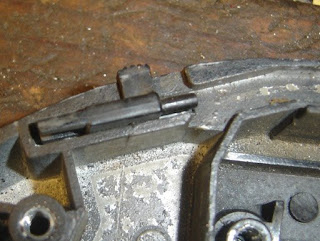
The "magazine" loading switch. I'd love to give the proper names for all these parts but the exploded diagrams don't always have them.

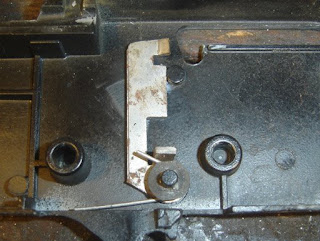
This part is fastened to the other part of the receiver. It prevents you from pulling the trigger when the bolt is open. When reassembling you have to have the bolt open to clear it. Reassembly and resealing had no surprises, just go in reverse.

I repainted the receiver, cleaned the plastic stock. Polished the bolt. I removed most of the rust with steel wool and hit it with some Oxpho blue. The bad news is that there's a massive air leak around the transfer port unit/barrel. So I need to take it apart again and fix that. But hey, it looks pretty!

Friday, May 29, 2009

Disassembling an early Crosman Model 760, Part 1

I decided to get the Crosman model 760 I bought last week into working order.

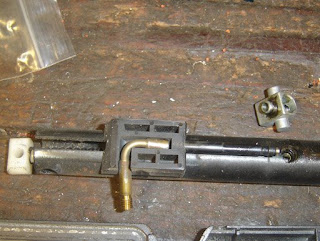
Hmmm, There's some sort of cap over the pivot pin.

Notice the surface rust. It appears the caps cover the roll pin.

A small pin punch removes a pin from inside the roll pin.

A tiny bit bent. A nice detail to cover up the ugly roll pin.

Now to remove that roll pin.

Punched it out. Seems there was a bit of wear in the pump arm pivot hole...just a bit...

Loosening the barrel band set screw. The barrel band is pot metal.

The plastic front sight and barrel band.

Removed the piston. It's steel with the same type of cup as on the modern 760.

Punched out the forearm roll pins and disassembled it all.

I have enough spare parts...found a replacement in my junk drawer for the one with the wallowed out hole. It's from an early 1377.

Another setscrew in the top holds the barrel on.

I removed three screws from the receiver.

Unscrewed the brass bolt knob.

Separated the two halves. Unlike the current model 760, nothing flew out and there was plenty of space inside.

Thursday, May 28, 2009

Crosman 180 Stock Refinish Part 2

Found a small block of walnut in the pile. There's a great lumber yard/mill work shop nearby that always has small pieces of walnut, cherry, chestnut, etc for cheap. If I see a good looking block or small plank, I'll add it to the collection.

This was the only walnut chunk I had that looked wide enough for both the butt as well as the forend tip.

Can't just trace the outline of the stock and cut. Remember that the toe continues the line outward.

Toe (angle on the left) has to be accounted for by leaving some extra wood at the bottom. The heel on the right is almost a straight cut.

Drew a rough idea of how the curve should look from the side. Gotta think a little bit in 3D before starting the saw. Cut the end off and set aside. That will be for the forend.

It's easiest to cut the curve for the shoulder first, as the block still has flat sides to set on the saw's table. Don't ask why I know this...

Good enough. A large sanding drum will be used to finish the curve later.

I took the corners down, as well. Less to plane or sand off later. Took care to leave enough for the toe of the butt.

Set a sheet of 80 grit garnet paper on a granite surface plate. Make the base as flat as possible to fit against the stock. I repeated this procedure on the gunstock as well.

I'm doing this quick and dirty. Eyeballed a couple stock screw holes, clearance drilled and countersunk.

Not shown: Used a transfer punch to mark the hole locations on the stock. Drilled the stock for the wood screws. Ended up using a couple deck screws. Not elegant? Well, they're strong
and have black oxide coloring. No need to blue. Did a dry test-fit then it was Gorilla Glue time.

Moving forward. Here's the excess walnut from the butt. Laid the 180 stock on top of the walnut block and traced the angle. A quick cut with the chop saw and I'm ready to sand.

Again, the granite block is used to get flat surfaces on the walnut and the stock end.

Used a ruler and drew 3 lines for reference. When gluing these together, they'll help with alignment. The lines are at 90 degrees from the cut on the walnut.

This is why I drew those 90 degree lines. I can set the base on the drill press table. Spotted and drilled a clearance hole.

Counterbored.

Transfer punched and drilled a hole in the stock. Used another deck screw to fasten the walnut to the stock.

Glued and drying here. Due to the angle between the wood surfaces, I thought it would be very difficult to clamp the parts together for the glue bond. The deck screw made this easy. After drying, the screw will be removed to inlet for the gas tube. If I got this right, the glue bond should be stronger than the surrounding wood.

More to come.