The gun is in exceptional cosmetic condition. The bluing is about 90+% I think we figured the gun was from around 1962--mainly by dating the second variant trigger as well as James' recollection.

The Crosman 180 is essentially a shorter and lighter version of the 160. The 160 rifle uses two 12gm CO2 cartridges, the 180 gets by with just one.

A generous amount of Crosman Pellgun oil and about $5.00 in CO2 cartridges proved that the gun leaked like a true champ.

Disassembly time.

Remove the CO2 end cap, the safety and the nut/washer from the locating stud.

Action lifts right out of the stock.

Remove the trigger housing bolts.

A threaded bushing comes out next.

Remove the rear breech bolt.

The hammer assembly slides out. Note the mushroom shaped breech cap.

The hammer plug slides right out.

Inside the rear of the breech, the bolt handle is held in by a screw. Loosen it a couple turns and the bolt handle pulls right out.

Just for the record, this is not the stock bolt handle. I turned this one on the lathe to replace the damaged original. The ball end was gone from the original handle. Initially I was going to make an exact copy, but then decided to add some heft.

Loosen the barrel band and it slides forward off the gas tube.

Remove the front breech screw.

The barrel, spacer, breech seal and gas tube can now be separated.

From the front end of the gas tube, the face of the valve is slotted for a special tool.

I made this from a piece of 3/4" diameter tool steel. A similar tool is currently available from Bryan and Associates. It's their tool #T-9 "valve body disassembly tool".

This is out of sequence, but it shows how the tool fits into the end of the valve face. Here's the important stuff: The valve is made of 2 pieces of brass threaded together at the o-ring. In the gun, the rear of the valve is held fast by the locating stud. The valve tool is then used to tighten the front of the valve--this expands the o-ring outward sealing off the gas tube. In the older Crosman CO2 guns, the valve does NOT seal on the end of the 12 gram cartridge. Because of this, a bulk fill cap can be used with an adapter to charge the gun from a paintball tank--eliminating the need for 12 gram cartridges altogether.

Back to the task at hand. Use the valve tool to loosen the valve a couple turns. This takes the pressure off the o-ring.

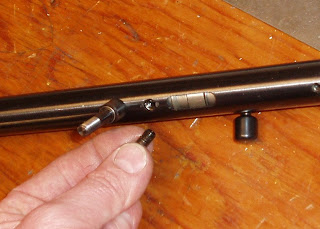
Now the locating stud can be removed. I grabbed the stud in a padded vise and turned the gas tube to unthread. The stud thread is #10-32.

Valve can now be slid out of the gas tube.

Old seal on the left. It looks and feels like a nylon washer. It's rock hard and has perfectly square sides. A new o-ring seal is on the right.

Time and pressure. Had to crack the old seal to get it off the valve thread.

Here's the old standard Crosman valve. They used this in many CO2 guns. I didn't pull the felt from the inside front of the valve. It was in great shape and I didn't want to tear it getting it out for a picture.
Spoiler: Replacing the valve o-ring and reassembling was a complete bust. The gun had a weird, semi-serious valve problem that took several days to work out.
More to come in a few days.
0 comments:
Post a Comment