
Nick and I have previously covered this model in full detail here. This time, I didn't need to de-gas the pistol to remove the barrel.

This setscrew actually doesn't secure the barrel so much as put pressure against the transfer port to prevent leaks. Nevertheless, I removed the setscrew.

The crown is so-so. It's not great, but it's certainly not the worst we've ever seen.

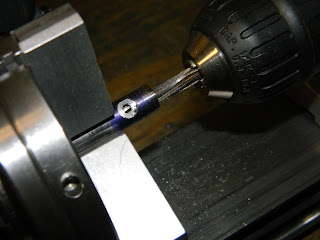
Took a skim cut to square the muzzle...
then cut a new crown.

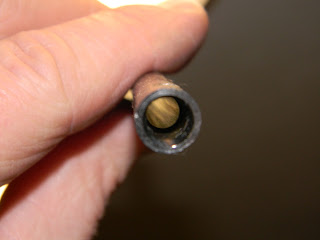
Before I reinstalled it, I took a look at the bore. This is a view from the breech. Ehhhh, the rifling is really shallow. Almost non-existent.

Pushed a .22 cal RWS Hobby pellet through the barrel. The head was untouched and the skirt barely kissed by the lands. Didn't feel any rotation.

So, here's the other half of the Crosman 2260 rifle barrel I chopped down for the last project. The lands and grooves are much more pronounced. Guess I'll put this barrel into the gun. So much for the quick re-crown.

Aside from the length difference, the S&W barrel is 0.380" diameter while the Crosman is 0.4375".

Turned down on the Taig.

With the barrel at diameter, I did some test fitting. Could leave it this long and pick up a few fps, but it's not a good look to my eye. The barrel is a push fit in the shroud. Thought about adding an o-ring or a setscrew to fix the barrel in place, but it seems snug enough.

Faced for the breech. Need to work back to front.

The transfer port on the S&W barrel is 0.405" from the end of the breech. The hole is 0.125" (1/8") diameter and the countersink is 0.156" (5/32")

Scribed a line 0.405" from the end of my replacement barrel. Centered up with a pointed indicator.

Spotted.

Through drilled.

Changed from the factory design and used a 0.250" end mill to cut a flat. Since the valve in the 78G has a 0.250" counterbore, it seemed just as easy to use a straight walled port rather than the stepped transfer port used by S&W.

The only difficult part was cutting the leade. Used a .250" tapered reamer as well as a small round-nosed burr. Did a lot of test fitting until the bolt latched closed.

Polished the leade to 400 grit.

Eyeballed a satisfactory amount of barrel protrusion and cut the barrel to length.

Cut a crown, then polished.

J-B Non-Embedding Bore Cleaner was used on a .22 cal brass brush.
The first dry patch after about 20 passes of the J-B.

1/4" OD vinyl tubing.

I'll try this for the new transfer port.

Here, it's pressed into the valve. The gun went back together without a hitch.
Replacement barrel protrudes about a hundredth of an inch or so more than the original. Left it long enough so it could be re-crowned again if I screwed it up.
Group sizes have been reduced by at least 50% from the original barrel. Should've done this a long time ago. Sharper sights and some additional weight would probably help me shoot this thing even better. The diecast front sight isn't as well-defined as I'd like, but I'm probably not going to change it.
Check back soon.


0 comments:
Post a Comment