A Crosman Quest 1000 with a Crosman branded 4X scope.

It's a .177 caliber spring piston rifle. Safe to assume the "Quest 1000" name relates to velocity expectations.
Overall, the gun didn't look too bad cosmetically. Joe bought the gun to deal with pests on his property. Chipmunks, squirrels... There were some minor marks on the stock. Wasn't scratched so much as marked by something else.
The phillips head stock screws have got to go. I'll replace these with button head allen screws.
Very thin surface rust covered much of the metalwork.
As I started to cock the gun, I felt the action shift very slightly in the stock. That sort of brought the sight-in project to full stop.
Kinda knew going into it that this would involve a full tear down. Started by removing the forward stock screws and the trigger guard. Fasteners were barely finger tight. The gun was essentially rattling itself apart from the firing vibration.
With the stock off, the white marks were buffed out with bronze wool.

Bronze wool is much softer than steel wool and left the wood finish looking untouched.

The white marks simply vanished.
Set the wood aside and removed the stock lug brace from the link pin.
Removed the oddly named "stock link pin". Note: This is the nomenclature that Crosman uses for the part (B18-00-9) on their EVP drawings.
This e-clip,
the anti-bear trap lever, and spring were next.

Removed the barrel pivot bolt.
Pulled the barrel and breech block assembly from the compression tube.
Didn't know how much preload was on the mainspring. Set it up in my spring compressor and drove out the cross pin with a brass drift.
Turns out, the mainspring preload was minimal. Only about an inch of compression was on the spring. This gun doesn't need a compressor to repair.
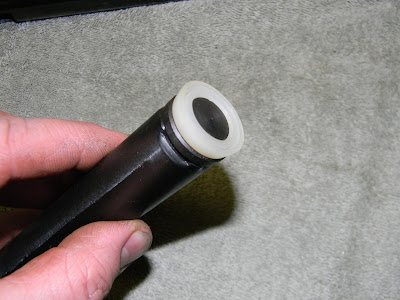
Plastic end cap, the steel cross pin, mainspring and spring guide.
The entire trigger unit is pushed backward and out of the compression tube.

Finally, the piston can be removed from the tube.
Piston seal is damaged on the edge. This often happens during initial assembly as the piston is inserted into a compression tube that was never deburred along the cocking lever slot.
Used a Flex Hone from Brush Research to cross hatch the forward (inside) end of the compression tube. This leaves very fine scratches that trap and hold lubricant. After flex honing, the tube was cleaned and dried. Then a very thin layer of a 60% moly grease was burnished into the tube.
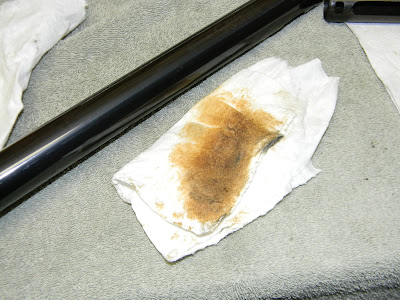
All the exterior metal was cleaned and rubbed down with Boeshield T-9 oil. That would be rust on the rag. Most all of the rust came off the gun with little damage to the bluing.
While it was apart, I deburred everything. Polished the rear of the piston body.
Removed the spring-loaded breech lockup detent. Buffed it then reassembled with moly grease. The barrel pivot bushing was also cleaned and greased.

Went though my seals and found a handful. Got these from Crosman a while back. This is a really common seal and at about $1.50 each, it's painless to have a few set aside. The seal is Crosman part number B18-04-1A.
Installed. I burnished the sides with a really small amount of moly before installation.
Mainspring got a thin coat of copper anti-seize.
Greased the sear contact faces of the trigger before reassembly. Gun went back together easily without the spring compressor. The only trick was getting the uppermost front tab of the trigger unit in position. The piston assembly must go into the compression tube first (and don't forget to line up the sear notch in the piston body with the cocking lever slot )--then the trigger unit can be installed. It's necessary to use something like a dental pick to pull that front tab downward as the trigger is slid into place otherwise, it won't seat properly to the compression tube. (It'll be obvious) After that, install the spring, plastic endcap and the cross pin. It's a straightforward reversal of the disassembly.

After a quick sight-in at 10M. 10 shots off-hand with Crosman Premier Hollowpoints. Since he isn't a crazy dyed-in-the-wool airgunner, it made sense (well, to me at least) to zero the rifle with a pellet he can readily find in the local mega stores.
Joe knew that he'd have to fine tune the scope adjustments to accommodate subtle differences in how he holds the rifle. Also gave him a couple tips on the artillery hold. While Joe was amazed at the change in firing behavior after the lube/tune, I was impressed with the accuracy.
Not sure what's on deck for next time, but thank you for reading and please check back soon.


0 comments:
Post a Comment